Image Slider

Gel nails and some nail art

Quick post to share a gel nail design and some nail art I did this weekend...

First up is a nail art design that I did on a friend of mine for her cousin's wedding. She has naturally long nails so it was a dream working on them. Here is the final result:


Next, is a gel refill I did for my boyfriend's aunt. I used a red colour gel with gold shimmer for the tips and a fimo flower and three blue round rhinestones for each of the ring fingers. Here's a nosey:


And this is how I did her nails two weeks before:
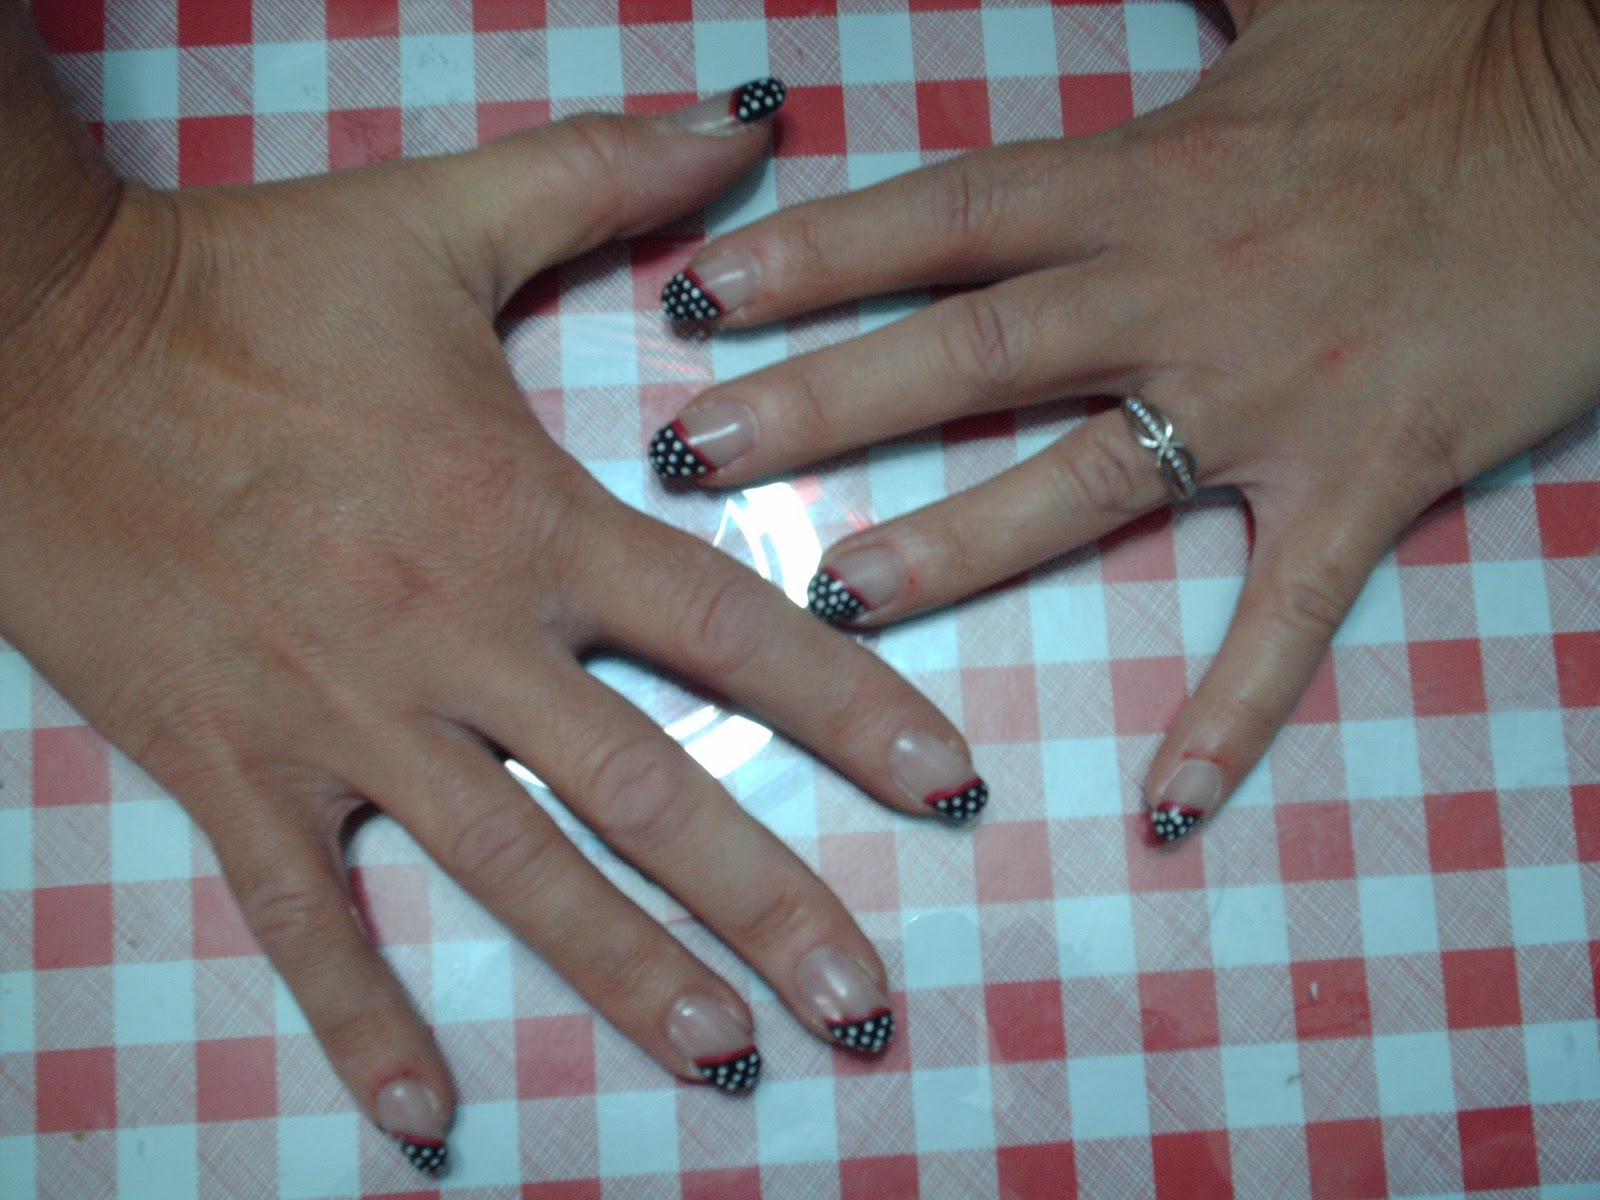

You can check out how to re-create the Polka dots design here. Actually, my client asked me to do this design because she saw my nails and loved them. Should you want me to explain how I created any of the other designs (as well as others I will post in the future), feel free to leave a comment!

Blogger Templates
Blogger Templates

Review: Rimmel Shock Gloss 3D Magnifying Lipgloss in 200 Clearly Clear

I believe every girl should have a trusty clear lipgloss in her make-up bag (apart from heaps of other make-up products that is :P). Mine is Rimmel Shock Gloss 3D Magnifying Lipgloss in 200 Clearly Clear.

I chose this out of the hundreds available on the market because I was curious. Yes! Curious... about the applicator not the gloss of course! Let's see what's so different with this gloss. The packaging is pretty much what you would expect a lipgloss to look like...


It has a spatula type applicator and Rimmel say with it you can control the amount of gloss you apply. I remember myself taking a look at it in the tube and thinking it had the fabric missing (like the doe-foot applicators), until I noticed there's a sticker on the cap which says the gloss has a spatula applicator. It is a bit tricky to get used to at first but once you do, it's as easy as 1,2,3!  I do agree that I can control how much product to apply, I just took some time to figure out how to handle the spatula... too much gloss and it could feel that my lips were about the fall with the weight, too little and it feels like I did nothing. With the right amount though, the lips have a beautiful plumped up appearance. The gloss doesn't last that long on the lips though. It carries no smell and taste.

I believe Rimmel have discontinued this line, maybe because people were complaining of the applicator. It didn't bother me, but I have to admit that I prefer the traditional doe-foot applicators.

Blogger Templates

NOTW: Murky French Manicure with a twist!

Hello my lovelies :) This week I decided to try the half-moon nail trend using Autumn colours. Here's how it turned out to be:


If you would like to give it a try, go pick your favourite 3-colour combination and let's get started!


  1. Prep nails by applying a clear base coat (I chose Florelle Nail Strengthener).
  2. Apply two coats of your preferred colour onto the entire nail (here I used elf Smoky Brown).
  3. When completely dry, attached half-moon tip guides to the bottom part of your nails (resembling the half moon on your natural nails). Then paint two coats of another colour on the area beneath the sticker guide. My choice was Desert Haze by elf cosmetics.
  4. When this dries, peel off the stickers carefully and using a detailing nail art brush apply a thin line to separate the two colours. I used Bronze Reflection by Oil of Olay.
  5. Finish off with a clear top coat and you're done!!!
I loved this manicure so much I took a few more pics of it to share with you all :)


Blogger Templates
Blogger Templates

Review: Revlon ColorStay Makeup with SoftFlex SPF 6 Combination/Oily Skin in 180 Sand Beige

I was looking for a good liquid foundation for the winter months as I find my skin needs a bit more coverage during this time of year than it does in the summer, and going through YouTube, the most raved about foundations were Revlon ColorStay and PhotoReady. So I hit the pharmacy to see which is the better of the two. I couldn't do a comparison because they only had ColorStay in my shade whilst they only had PhotoReady in the darker shades.  Anyways, I went for the shade 180 Sand Beige for Combination/Oily Skin. After a month of using it (weekends only), here are my thoughts about it.


What you get is a transparent glass jar with a screw-off black cap. The transparent jar makes it easy to compare shades if your pharmacy/store doesn't have testers, so you can take your usual foundation and compare them just by placing the bottles near each other. The way you have to dispense the product on the other hand is not that convenient. For this reason I really wanted the PhotoReady one as it comes with a pump dispenser; this, you pour it out. This may mean waste of product and messy bottle necks and caps (I wipe the neck after each use because I'm obsessed with my make up looking like new!).


When you open the bottle for the first few times, a solvent-like smell will greet you. Some argue that it puts them off; me, I can't say I like it, but it doesn't bother me that much, plus it faded in less than a month. I still smell it, but it is not as strong as it was when I first got this foundation. Furthermore, it doesn't linger on your skin.

With regards application, this foundation dries pretty quickly, so I suggest you work on small areas at a time, blending quickly and thoroughly for a seamless finish. Even though it dries quickly, before it is completely dry, I find it goes a bit tacky-like. I counteract this by applying a translucent powder in circular buffing motions with a dense powder brush. I don't like however when it tends to stick to my nail polished nails and to remove it I have to really work hard with make up remover.

I'd say this foundation offers very good coverage. I only use it on weekends though because it is more evident compared to my everyday mineral one and I also restrain usage to the bad-skin-weekends only. The shade however is a perfect match for my skin and doesn't feel weighing at all. It has a fairly liquid consistency, although it may be a bit on the thicker side. This doesn't bother me as such because I use a small amount and it still looks rather natural.


Left: Not blended; right: blended  

It's a good thing this foundation has some SPF in it but 6 is definitely not enough, especially if it is someone who uses this as an everyday foundation. So remember to slather on a moisturizer with a good SPF underneath. I don't do this because like I said earlier, I use this foundation at night.

Revlon ColorStay Makeup is available in an array of shades for both Normal/Dry skin types and Combination/Oily skin types. I bought mine for €17.94 for 30ml.

Blogger Templates
Blogger Templates

Review: Rimmel 60 Seconds Nail Polishes

By now you would have probably noticed how much I love Rimmel and there's no doubt I have some nail polishes from them as well. Today, I review the 60 Seconds nail polishes I have, which is currently my favourite range from Rimmel. I had tried the French Ivory from the French Manicure range, but for me, nothing beats the 60 Seconds Range.

Out of the 24 available shades, I own 5. I know it's not a lot, but I have shades similar to the other ones in the range so I stuck with 5... till now :P. Here are the protagonists of today's post:


Left to right: 610 Pompous, 730 Silver Bullet, 270 Shocker, 619 Pulsating and 260 Funtime Fuchsia

I had featured the first three in my Top-Ten Tuesdays post for Rimmel because they are my favourites, however, 610 Pompous is my ultimate favourite out of them all.

As you can see from the swatches above (all 2 coats), Pompous is a shimmery violet, Silver Bullet, Shocker and Pulsating are pearlized and Funtime Fuchsia is a creme. I usually apply two coats for an intense colour, but often, 1 coat gives enough opacity. Application is really easy with these polishes as they are very smooth and not at all gooey. However, I prefer the thinner brush (Pro-Cision Brush TM) of say Silver Bullet rather than the new, thicker ones (Xpress Brsuh TM) because my nails are quite narrow and therefore I am more liable to paint the skin on the sides of my nails.


These polishes all dry fairly quickly, hence the name 60 seconds but they still give you enough time to arrange any flaws. Having such a quick drying time, they are perfect for ladies always on the go.

Do you own any of the 60 Seconds nail polishes? If so, which ones and how do you like them?

Blogger Templates