Image Slider

Showing posts with label decals. Show all posts

NOTD | La Ville Des Lumieres

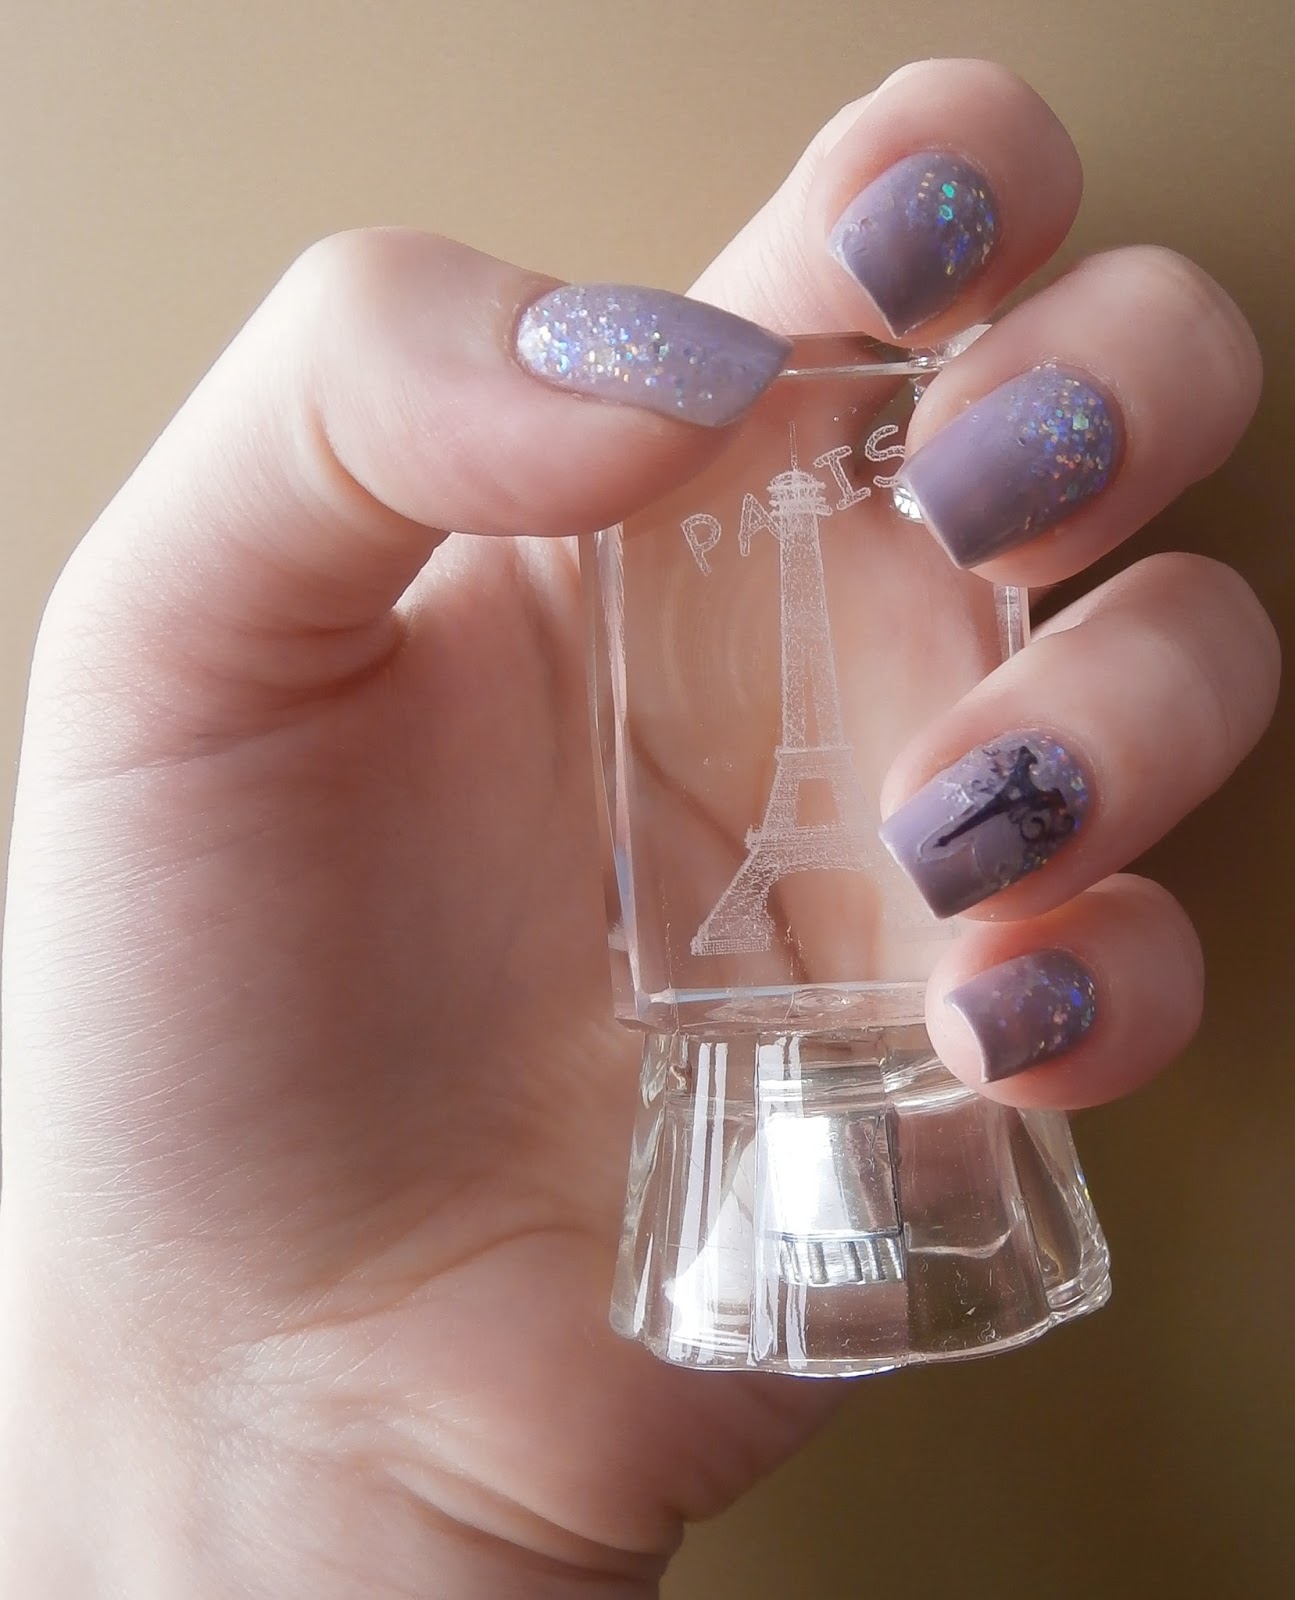
Good afternoon everyone :) This week I was looking through some pictures and I came across the ones from my last visit to Paris and since I have recently bought a pack of Eiffel Tower nail decals, I thought I should create some nail art with them.

When I think of Paris, a million adjectives cross my mind, especially the city's 'nickname' la ville des lumieres (city of lights) and I came up with this manicure. Read on to learn how to achieve the same look!
 

1. Apply a base coat to protect the nails.

2. Follow with two coats of a dark lilac polish. I used Essence Colour & Go 131 Ballerina's Charm.

3. When dry, apply a glitter polish such as China Glaze Snowglobe to the base of each nail. Start by dabbing the glitter onto the nail and gently drag it up towards the centre to achieve a gradient look. Allow to dry.

4. When dry, pick a sticker the size of your nail and affix it in the centre of the nail, a little above the base to give the illusion of lights behind the Eiffel Tower.

5. Seal with a top coat for a longer lasting manicure.


Designer Nails thanks to Born Pretty Store Gold Nail Decals

As a nail technician, I am very fond of hand painted nail art but certain designs are usually a little hard to accomplish on such a small area. A case in point are certain designer logos and detailed works such as butterflies. In such instances, I like to resort to nail decals and with such a wide variety available, you are bound to find what you are looking for.

Born Pretty Store have recently introduced a set of 12 different gold decals to their nail art embellishments section. You get a small rhinestone wheel with designs ranging from desiger logos to flower and butterflies, hearts and snowflakes, as well as Hello Kitty motifs.


There are 10 pieces of each motif, hence a total of 120 pieces and all are gold in colour. Unlike most metallic embellishments, I am very pleased with these as the gold colour is retained when you apply top coat on them.

The decals lasted for a whole 5 days on my nails and they are easily embedded with top coat. All of these decals are suitable for use with gel nails, acrylic nails and also on natural nails and can be used by professional nail techs as well as amateur nail art enthusiasts.
 
Get yours at 10% off instead of the usual $2.99 by entering the code EBABK31 at checkout on www.bornprettystore.com


PR Sample

NOTW: Louis Vuitton Inspired

Good morning all :) This week I have been sporting Louis Vuitton inspired nails after I was sent some decals from Born Pretty Store (stay tuned for the full review). Read on for the step-by-step tutorial!


1. Prep nails with Orly Nailtrition base coat to strengthen the natural nail and protect against discolouration.
2. Paint on a French tip with a caramel coloured polish such as Pronails no.267 on all the nails and paint two coats of the same polish on the ring fingers.
3. Allow to dry and with a light beige nail polish such as Essence Nude Glam in 06 Cookies & Cream and a detailing brush, paint on a diagonal stripe across the caramel French tip, leaving a triangle of the first colour showing through. Repeat this step with E.L.F. Nail Polish in Chocolate or any other dark brown polish.
4. Make sure that the ring fingers are completely dry and apply striping tape in the form of a grid. Paint on with the same dark brown polish and gently peel off the tape after a couple of seconds.
5. Place a small drop of clear nail polish in the middle of the nail and gently lower a gold decal. Secure in place by adding some top coat and leave to dry.
6. Top coat all the other nails and you're done! Designer nails in no time!


NOTW: Geometrical Sparkles

Here's a fun and girly mani for this week using my new nail polishes and some enhancements:


And here is a step by step explanation to help you do it yourself! It's really easy and fun to do, so go grab two coordinated polishes and some decorations and let's get started!

1. Apply a clear base coat all over the entire nail and follow with two coats of a multi-tonal colour of your choice (I used BYS Cosmetics Passion Pink - pictured below).

2. When these dry, apply two coats of a glitter polish on 2/3 of your nail up to the tip on each nail.

3. While this is still wet, select some decorations to apply on your nails. I chose some multi-tonal pink hexagonal shapes from Viva La Nails and applied them in a zig-zag pattern on each of my ring fingers.

4. Leave to dry and seal everything with a top coat and you're done!


Blogger Templates
Blogger Templates