Image Slider

Showing posts with label Orly. Show all posts

August Collective Haul

August is one of my favourite months of the year - some might think I'm crazy to say such a statement but it's true! It's probably the only month where I don't feel cold (yeah even in out hot summer, I always carry a cardigan with me on evenings out) and somehow it's the only month where I get to enjoy summer properly.
 
Here's what I have been buying to make this month even more fun :)

Starting with beauty stuff, this month I have added some new nail polishes to my collection and I bought most of them from Gozo...and they are mostly Sally Hansen. They were €4.50 each for the Xtreme Wear ones (l to r: 540 Glitter Gun, 740 Carnival and 510 Strobe Flash) and €7.50 for the Fuzzy Coat in the shade 600 Fuzzy Fantasy. I have also purchased the Pupa Milano Gel Top Coat for €6 and a Montagne Jeunesse Sensitive Skin Masque for €2.31. The lady at the counter was also kind to throw in a sample of Max Factor Face Finity Primer which is my go-to primer in the summer months.
 
 
More Sally Hansen products, this time another nail polish from the Xtreme Wear range which was also €4.50 and the shade is 450 Ice Pop. I also bought this Cuticle Rehab pen which I shall be reviewing soon but for now I will only tell you two words...get it! It's the best €9.95 you will ever spend on your nails! I was looking for a good waterproof mascara as I swear by it in the summer and I decided to give this one by Max Factor a go. It is the False Lash Effect Waterproof Mascara and all I can say is that I love it! I use it everyday and it only comes off with makeup remover - no smudging or budging all day! It cost €13.65.
 
Another nail polish which I added to my collection is Orly Rage. I have this in Gel FX form and I love it so much I decided to buy it in polish form for when I'm in a hurry to do my nails. It is a nice rose gold foil that goes with everything and I believe it cost me somewhere around €6 from Ebay.
 
 
More beauty purchases from The Body Shop! I have just used up a body scrub and so I obviously had to get a new one. I settled on the Vineyard Peach (€12.50) variety this time; will see how it performs. I also wanted to try the newly launched Instablur (€14) which is basically a sort of primer that evens out the skin and the likes. Since I had arrived to my fourth stamp on the 'Love Your Body' card, I have had €10 deducted from my bill and only ended up paying €2 for this Coconut Eau de Toilette which has become my favourite everyday fragrance (normal retail price: €12).

 
Sleek MakeUP have launched a new limited edition i-Divine palette, the Arabian Nights Smoke & Shadows (left) and I went ahead and got that along with the Snapshots palette (right). I really like Sleek palettes for their colour pay-off and the clever names they give to their eyeshadows. The palettes cost €9.99 each.


The last beauty purchases come courtesy of Kiko. I have only just discovered that the brands ships to Malta and I placed a small order to check the brand out as I have heard a lot of good things about it. I only paid €7 shipping as I spent over a certain amount and the order was here in 4 days I think. All was securely packaged and nothing broke on transit. Very impressed!
 
This is what I actually got:

Daring Game Limited Edition Queen of Hearts Eyeshadow Palette 03 Elegant Ebony €14.90
Eyes 207 Brush €9.00
Life in Rio Limited Edition Face Brush Duo €11.80
Brush Cleanser €5.90
Smart Lipsticks in 904 Strawberry Pink, 916 Golden Beige & 911 Watermelon €3.90 each


Whenever I visit Gozo, I always make it a point to visit Pimkie since we do not have one in Malta and I really like their clothes. This time I managed to get my hands on this denim waistcoat which was on sale for €13.99 and I also got this pair of floral jeans from their new collection at €25.99. 
 

From Stradivarius, I got this oversize top and midi skirt which I instantly fell in love with! They are part of the new collection and I really can't wait to wear the skirt but since it's fabric is a little thick, I would have to weather till the weather cools down a little. The top cost €25.95 and the skirt cost €19.95.


From Calliope I scored this creamy yellow scarf for just €2 in the sale section. I really look forward to wearing it as scarves are my favourite winter accessory :)

 
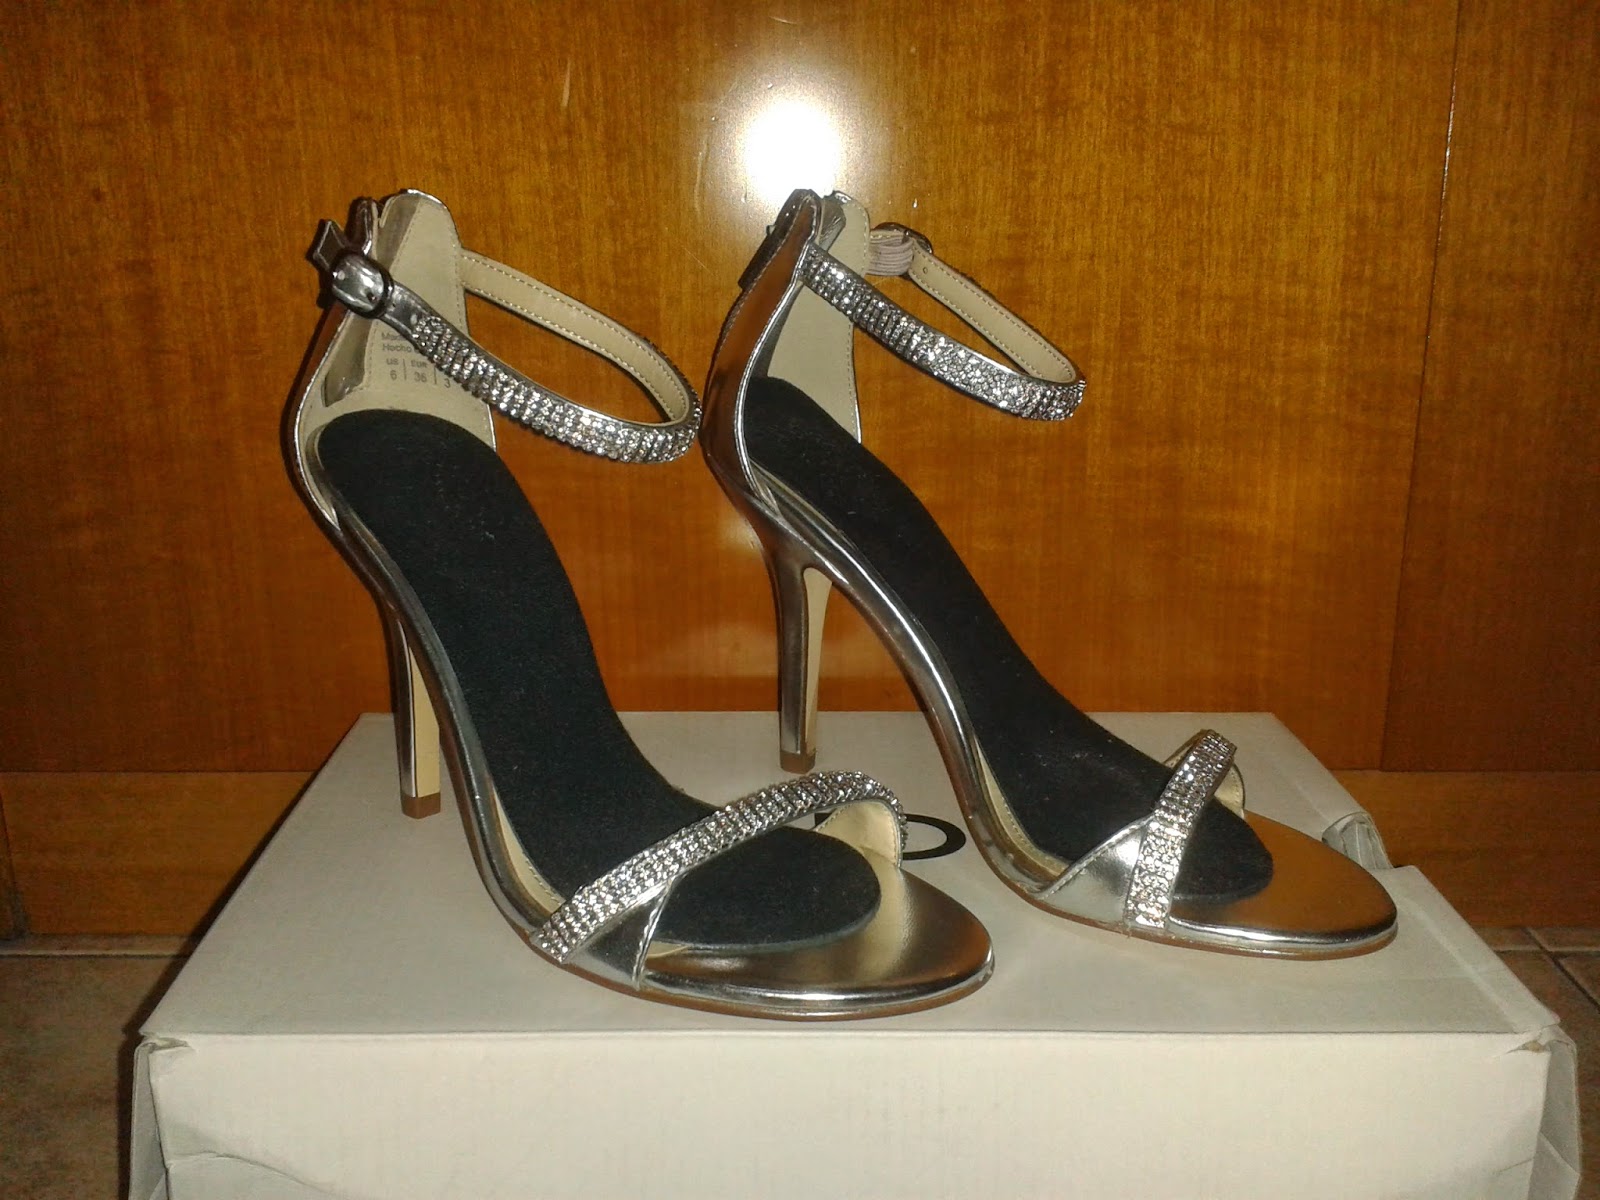
Finally, finally, after years of searching for the perfect pair of silver occasion sandals, Aldo has answered my prayers! I badly needed a pair for weddings (in fact I just wore them for one last Friday) but they either weren't to my liking or they didn't fit. This pair, on the other hand is ace! And best of all, it was on sale for €45!
 
Accessorize really do offer a good sale and for the last few days, they put sale items on 70% off. I treated my self to this cute yellow bag which only cost €10.25 and this pair of daisy print sunglasses which were retailing for just €5.50. I also bought this pair of earrings which are part of their new collection for €9.90.


Lastly, from River Island, I bought this wallet as I needed a new one and I love the flowers and stripes print on them. They have a nice selection of good quality wallets and  paid €22 for this one and it has enough space for all my cards and the bits and bobs I usually carry in my wallet. I also bought this wine crop top as it was on sale for €14.
 
 
So, as I sadly wave goodbye to August, that is all I bought this month!
 

Review | Orly Bonder

Today I will be reviewing Orly Bonder which has been an indispensable product in my kit ever since I tried for the first time.
 
Orly Bonder is a rubberised basecoat which promotes nail polish adhesion for longer-lasting manicures. It comes in an 18mL bottle featuring Orly's rubberised grip cap and like all nail treatments from the brand, it comes in a carton box with an open front window. I'm a big fan of the grip cap because it makes for a steady application and I must admit that I prefer the new one to the old one.
 
 
The polish has a light orange tint which doesn't really show up on the nails. However, it did stain my nails orange just a little after using it for the first time so I prefer to apply this over another basecoat such as Orly Nailtrition and that seems to work for me. It smells just like other polishes would and the brush is the right size to work on any nail bed. It dries quickly to a matte finish that actually feels rubbery.
 
As for it's performance, I find that my manicures do last longer when I use this product than when I don't so I guess it really does work. Just one coat is enough to achieve the desired rubberised effect so the product is sure to last you a long time.

I would recommend Orly Bonder to anyone who wants to achieve longer lasting manicures at home...and who doesn't?!
 

Nail Polish Collection | O.P.I., Zoya, Essie & Orly

Next up in my nail polish collection are O.P.I., Zoya, Essie and Orly. I have grouped these brands because I do not have a lot of polishes from any of them. Out of all these, O.P.I. is my favourite brand. I really like their formulas and the creative names they always come up with! I tend to go for their glitter mostly because of their unusually unique combination. I would like to experiment more with the other brands though especially Orly since I use their Gel FX on my clients. Here goes!


Nothin' Mousie 'Bout It (Vintage Minnie Mouse Limited Edition - Summer 2012) - iridescent pink, purple and gold glitter and light pink heart confetti suspended in a light pink jelly base
Minnie Style (Couture de Minnie Limited Edition - Summer 2013) - pink, white, red small hex glitter and white square confetti in a transparent base
Lights Of Emerald City (Oz The Great and Powerful - Spring 2013) - opaque white squares and smaller iridescent square confetti in a clear base
What Wizardry Is This? (Oz The Great and Powerful - Spring 2013) - dark brown with greenish-gold reflects. Dries to a matte finish and features O.P.I's ground breaking textured finish
When Monkeys Fly (Oz The Great and Powerful - Spring 2013) - large gold hex confetti mixed with different sized holographic hex glitters in a clear base
The World Is Not Enough (Skyfall 007 | The Dangerous Shades - 2012) - pewter with pink, blue and silver shimmer and a touch of bronze
Skyfall (Skyfall 007 | The Seductive Shades - 2012) - luxurious burgundy crème with maroon undertones


The Man With The Golden Gun (Skyfall 007 - 2012) - luxurious 18K gold leaf pieces in a clear base.


Lara - bright pink crème
Neely - pastel mint crème


Vanity Fairest - sheer nude pink with tiny silver shimmer
Licorice - black crème
Stylenomics - dark green crème
Very Structured - dark tan crème
In Stitches - dark old rose crème
Shine Of The Times - iridescent flakes in a clear base


Dazzle - silver foil


From Orly, I also have my two favourite base coats of all time, namely Nailtrition and Bonder which help strengthen my nails and polish to adhere better respectively.

Which is your favourite brand/shade out of the ones in this post?

*Update*

Here are two O.P.I. polishes that I have received after posting this collection instalment:


Alcatraz...Rocks (San Francisco - Fall 2013) - navy blue with multi coloured shimmer. Dries to a matte finish and features O.P.I.'s ground breaking textured finish
Which Is Witch? (Oz The Great and Powerful - Spring 2013) - holographic silver large hex and bar glitter 


Review | Orly Gel FX Gel Nail Lacquer

Gel nail lacquer has taken nail polish to a whole new level and in May, I have introduced Orly Gel FX Gel Nail Lacquer to my clients...who doesn't want nail polish that lasts for 2 weeks without chipping and still stays glossy? Here's my take on the whole Orly Gel FX system after trying it out myself and also, what my clients have to say about it so far.
 
The Orly Gel FX system is comprised of a Primer, Base Coat, Top Coat and over 44 nail lacquer shades to choose from, all of which have to be cured under UV light for just 30 seconds (except for the Primer which is air dried). All products are supplied in 9ml nail polish bottles. The bottles are completely opaque due to the products' sensitivity to light and they feature Orly's award winning rubber cap that enables a firm grip. The brush applicator is a typical nail polish brush except for the Primer and Basecoat, each of which feature a shorter brush.

 
Apart from the gel elements, the system also comes with a 3-in-1 Cleanser and Gel Remover (each available in different volumes) as well as foil wraps, buffer, dry brush, LED lamp and cuticle oil. I didn't buy everything as I already had most of the equipment since I do gel nails. These are the items I got:


At the time I purchased the items, the buffer and foil wraps were out of stock so I ordered them a few weeks later. Apart from a selection of all the colours I offer to my clients, there is the Shade Shifter which I will talk about in a minute.


The foil wraps are a novel idea which I like as they come incorporated with a sponge and they can be tightened effectively around the nails for optimum removal of the gel.

The system also comes with what Orly call a Dry Brush that is used to brush down the tacky layer from the basecoat. I like how the bristles are shaped to mirror the shape of the cuticle as this enables more precise brushing and they have just the right degree of flexibility.


Preparation is the same as for all gel manicures as anything gel doesn't like an oily base, otherwise it will just lift off the nail. Clients and myself are quite impressed with the fact that application is very fast and the gels cure in just 30 seconds under LED light (I like to leave them in the lamp for a few more seconds since mine is a UV lamp). The important thing is to seal the edges to prevent thickening of the polish and make sure the manicure lasts for 2 weeks without chipping.

As for the Shade Shifter, it works only with the Orly Gel FX Lacquers and it goes clear if your hands are in a warm temperature and dark if they are in a cold ambiance.


Removal is pretty easy thanks to the specially designed foil remover wraps and gel remover. After soaking the nails for around 15 minutes, all you have to do is gently push off the product and you're ready to begin application of a new colour! These are the colours I currently offer:


I have been using Orly Gel FX myself as I find the product doesn't chip away when using gloves (my work involves the constant use of gloves) and I am pretty impressed with them. Nail art can still be done on the gel polishes as well. Here are some pictures of manicures I have created for my clients:


For more pictures, prices and information on the services I offer, please like my Facebook page here.

NOTW | Spring Blooms

The weather this week kept me in a spring mood and I opted for a floral manicure again. This time I tried the two accent nails look and I used three base colours.  Follow the simple steps to a little garden on your finger tips!


1. Prep nails with a base coat and leave to dry completely.
 
2. As base colours, I used Wjcon Nail Lacquer N.702 for the thumbs and index fingers, Essence Tip Painter for the middle and ring fingers and Essence Colour & Go 128 Let's Get Lost (mixed in a 1:2 ratio with the white nail polish) for the pinky fingers. Leave to dry thoroughly.
 
3. For the flowers, use a medium sized dotting tool to create 5 petalled flowers or 3 petalled flowers in the corners of the nails. Drag the centres of each petal toward the centre of the flower with a small dotting tool. For the flowers, I used China Glaze Lemon Fizz, Wjcon Nail Lacquer N.702 and Essence Colour & Go 128 Let's Get Lost.
 
4. Apply a dot of silver foil polish in the centre of each flower and leave to dry. Here, I used Orly Dazzle.
 
5. Seal everything with a top coat and you're done!


NOTW: YSL Inspired New Half-Moon Nails

Hey all! Here's another NOTW tutorial for you!  This manicure is inspired by YSL's AW 2010 nails seen on their models.  It is basically a French Manicure but instead of leaving the base nude and colouring just the tip, two contrasting colours are used to give it a whole new dimension.

I used different colours though I remained faithful to the purple bottom colour and I did an upside down half-moon on the tips rather than following the natural curve of the nails.

Here's the end result:


If you like what you see, grab two contrasting colours from your stash and let's get started!

1.  Start off by applying a good base coat.  This is always necessary but even more so when working with dark polishes so as to prevent the nails from getting stained.

2. Paint two coats of a base colour of your choice and leave to dry. I used elf cosmetics Party Purple.

3.  Now for the tips, you can either follow the usual shape of a French tip or else do like I did and use curved tip guides to create an upside-down half-moon tip.  Make sure the base colour is dry and affix the tip guides like so:


4. Paint on the second colour of your choice above the tip guide and allow to dry. Here I used Orly Dazzle.

5. When this dries, carefully remove the tip guide and you should be left with something like this:


6. To finish the design, apply a clear top coat and you're done!


Blogger Templates
Blogger Templates